It would not be a proper fall on the blog unless there were two new posts: a fall dessert and a DIY project. The fall dessert is on the way, but here’s the DIY project. These DIY pumpkin pillows are inspired by Pottery Barn’s Halloween 2021 collection.
Over the summer, Pottery Barn released their Halloween collection. Two pillows caught my eye: a ghost pillow and a jack-o-lantern pillow. I wavered too long on buying them and they kept going out of stock. Then in late July, they were available again, so I ordered them. The pillows were supposed to be delivered in October. Then the delivery date moved to November. A very sad moment. Currently, that estimated delivery date is now the end of February to early March. What kind of scheme is Pottery Barn pulling here?
I told my mom about these out-of-stock pillows when I ordered them and she went searching for the materials. She even figured out the best way to make these. When we visited my parents over one of our last summer vacations, my mom and I crafted over half a dozen pumpkin pillows.
DIY Pumpkin Pillows
My only regret is I wish I had made a jack-o-lantern one! What made some of this work easier was my mom’s sewing machine. However, you can absolutely do this without a sewing machine. The machine is only one part of this.
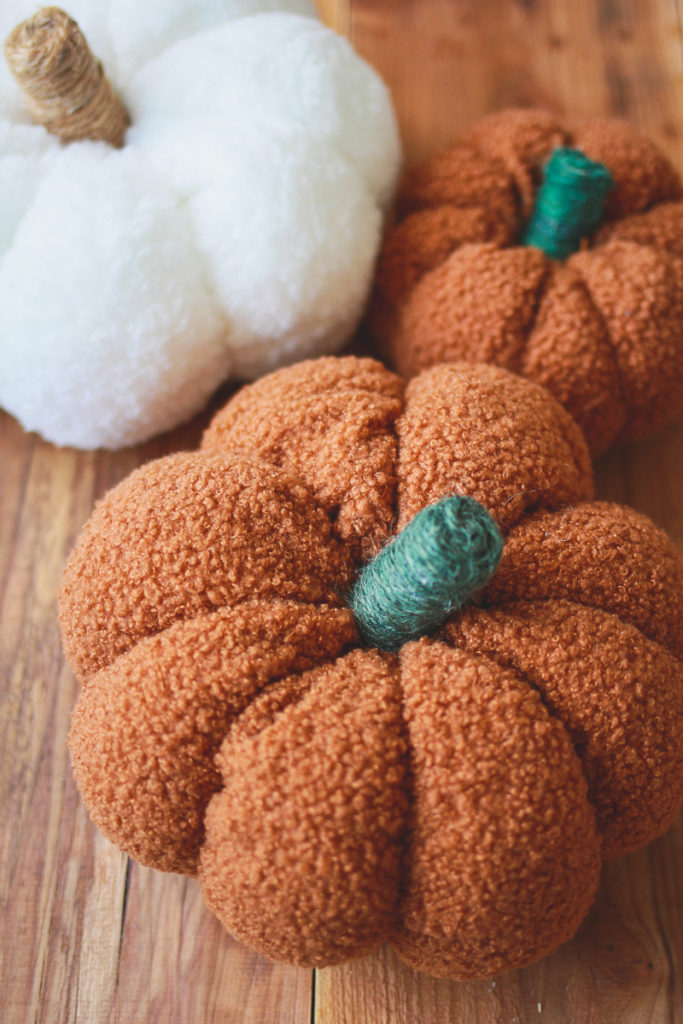
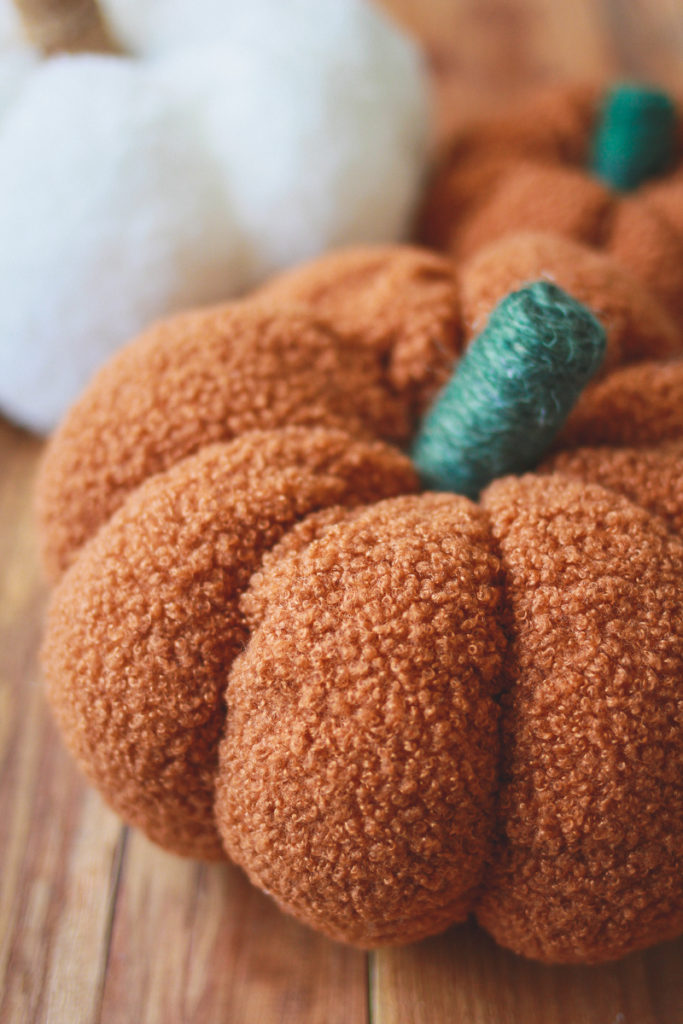
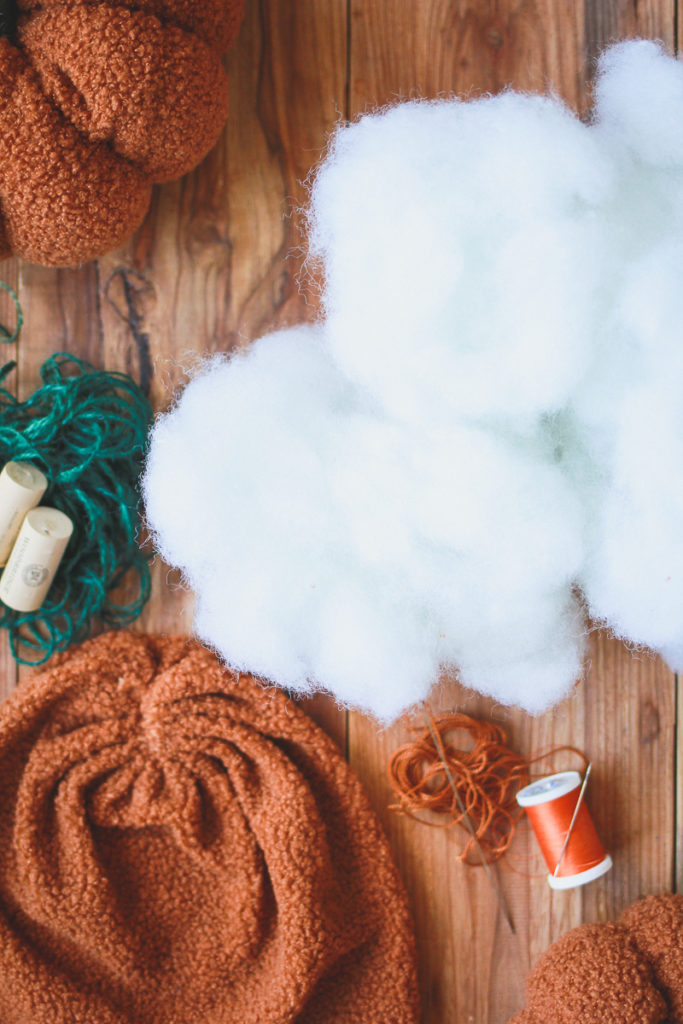
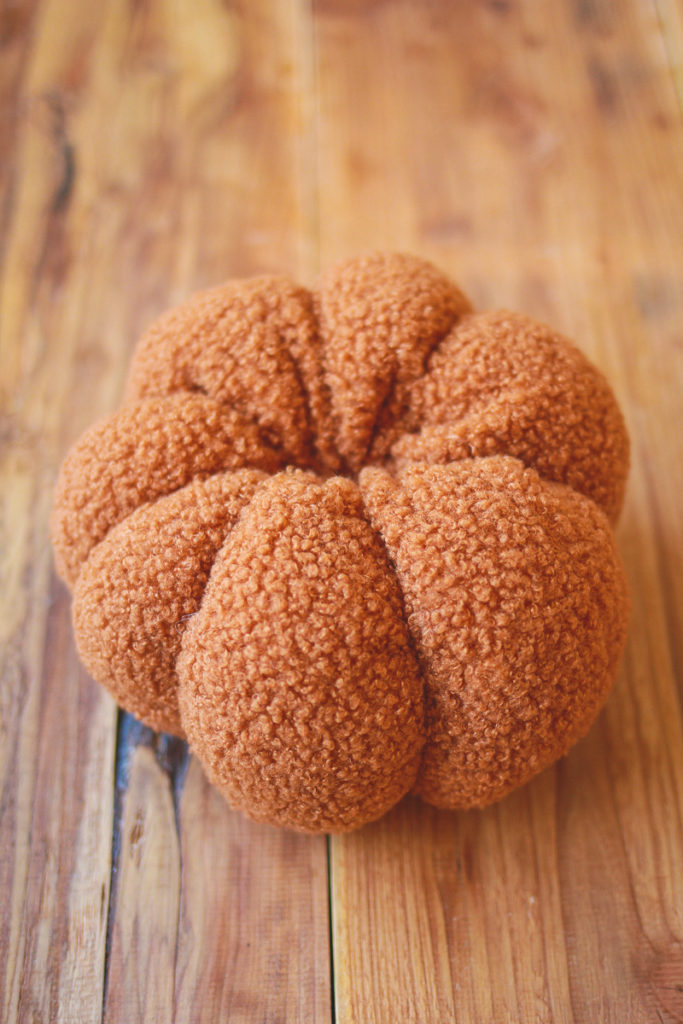
The fabric was hard to find. Joann Fabrics had some. Etsy had some. But that was it. To be honest, I don’t even know what the technical name for this fabric is. We just kept searching for ‘teddy bear’ fabric. My mom found it somewhere and she found a perfect burnt orange color.
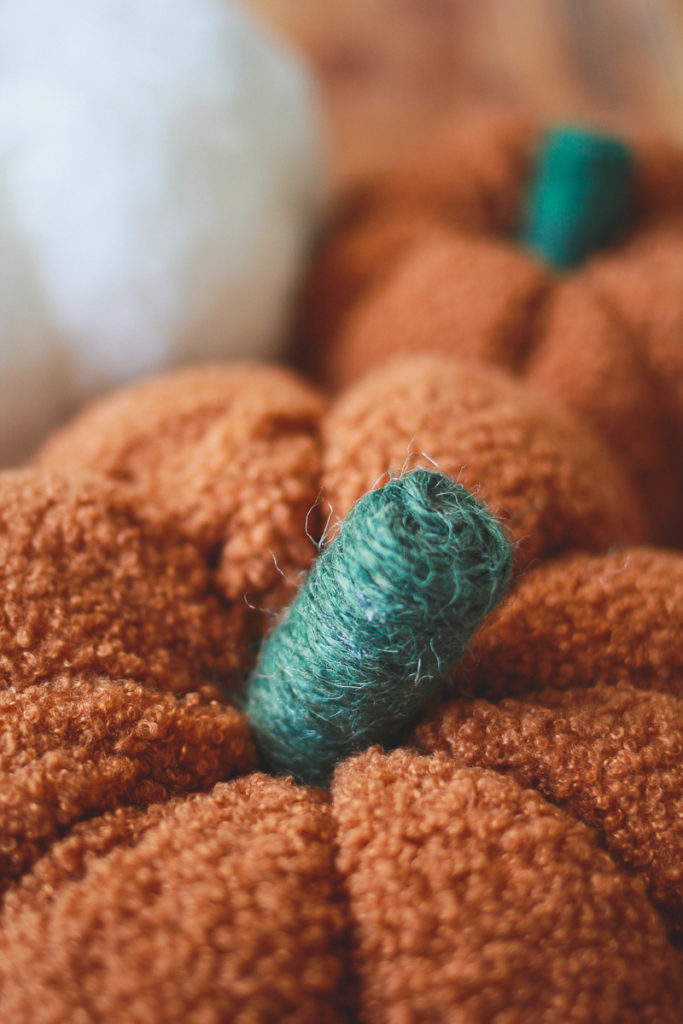
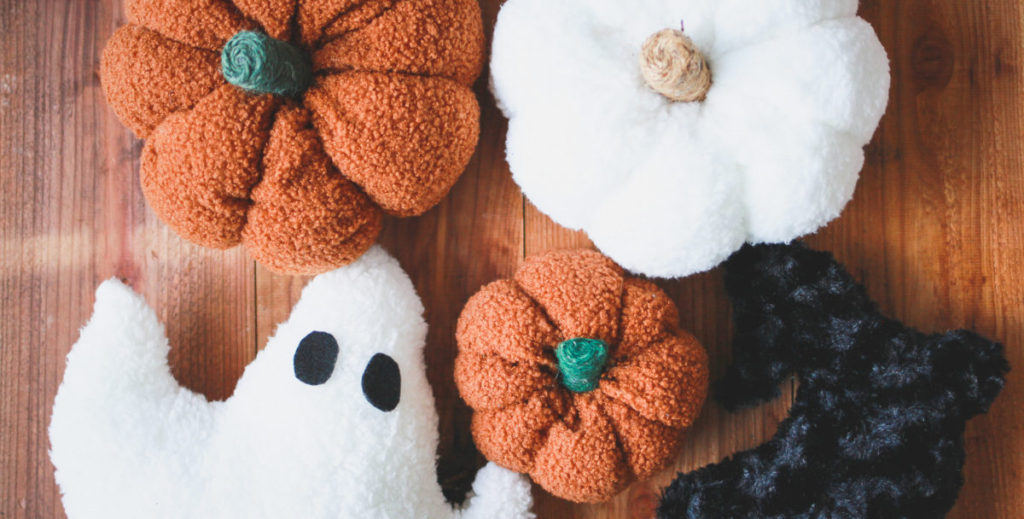
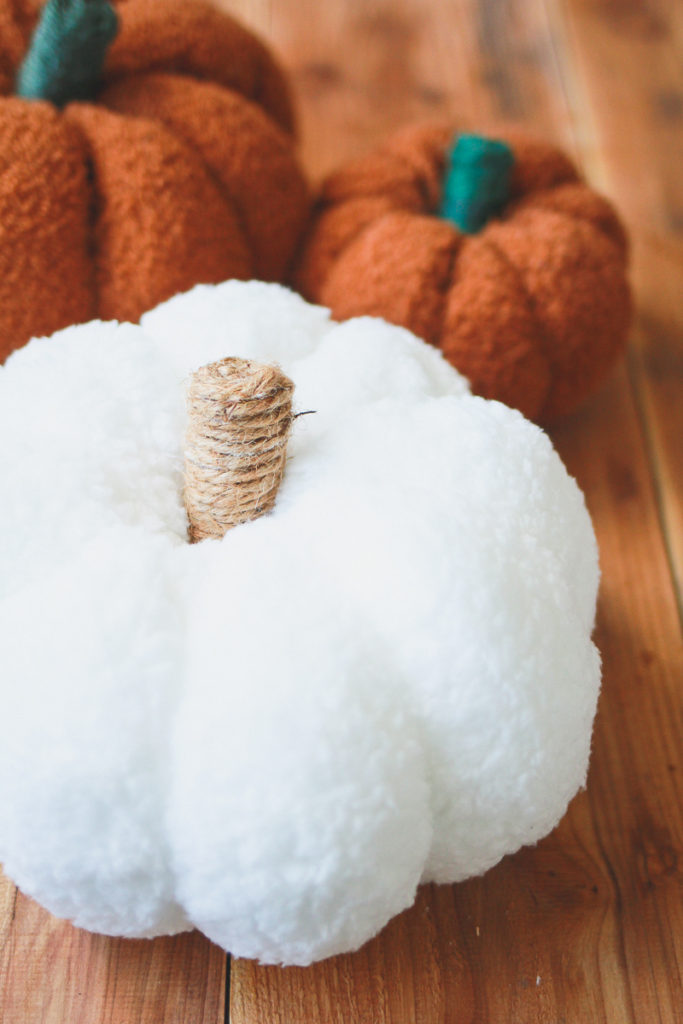
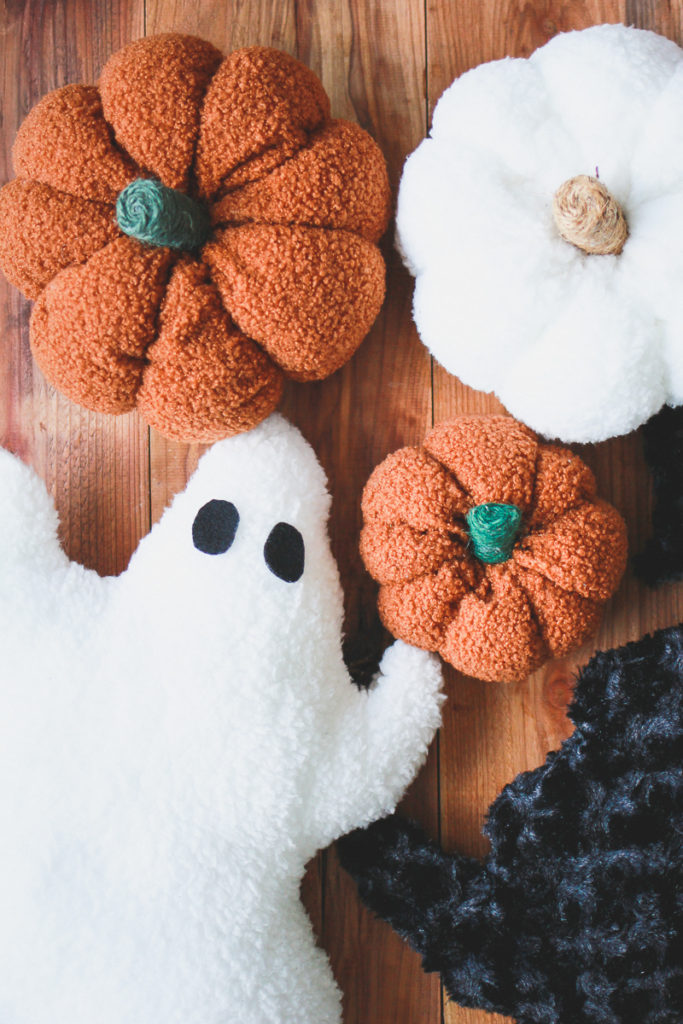
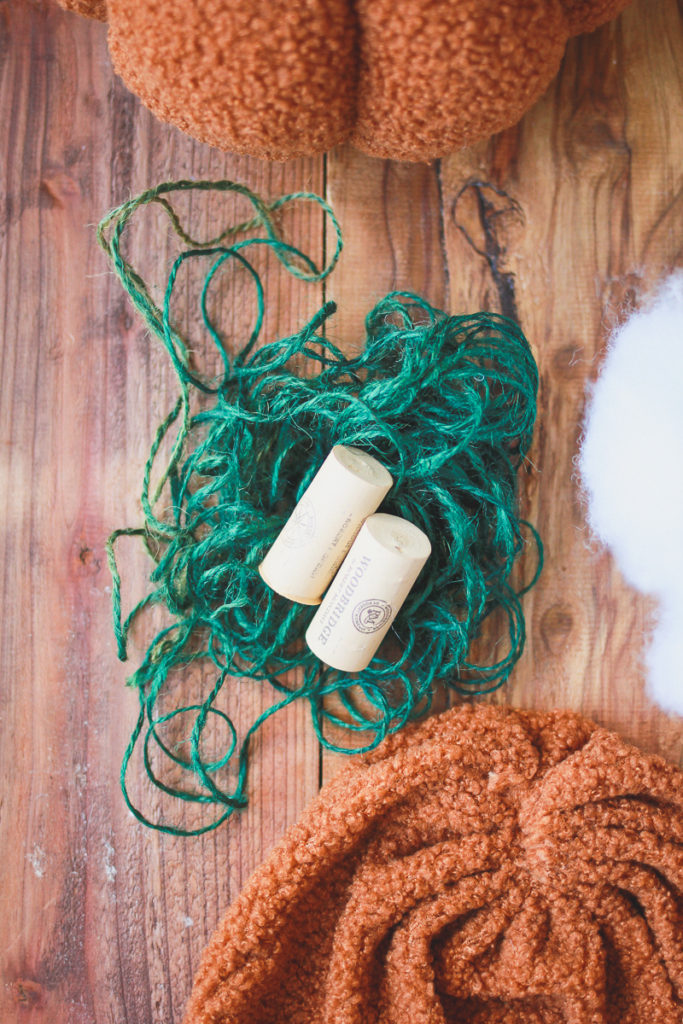
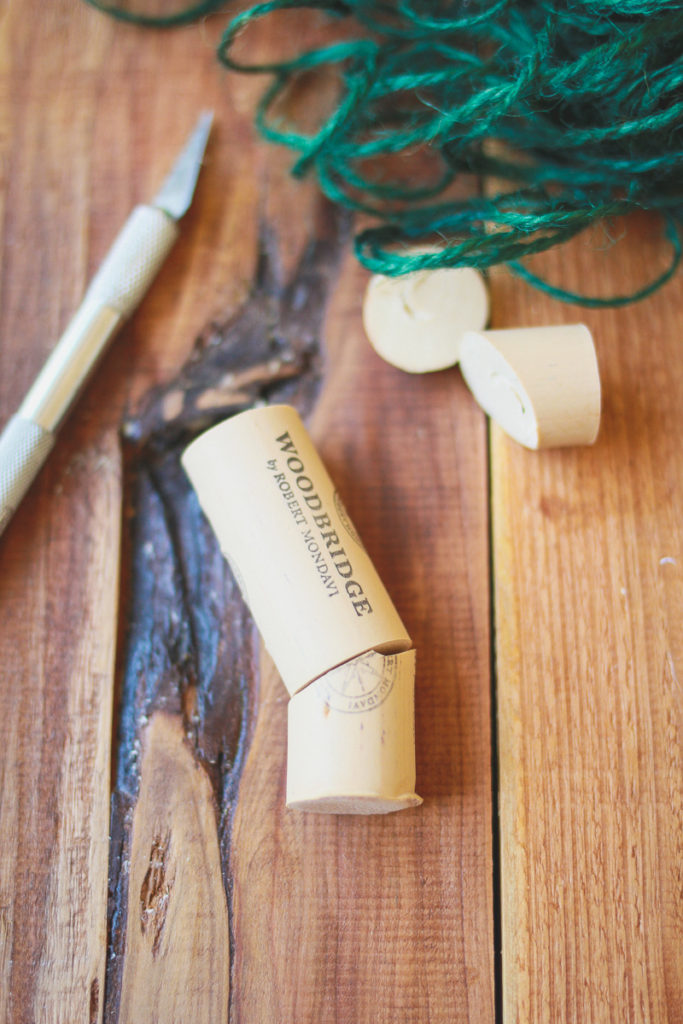
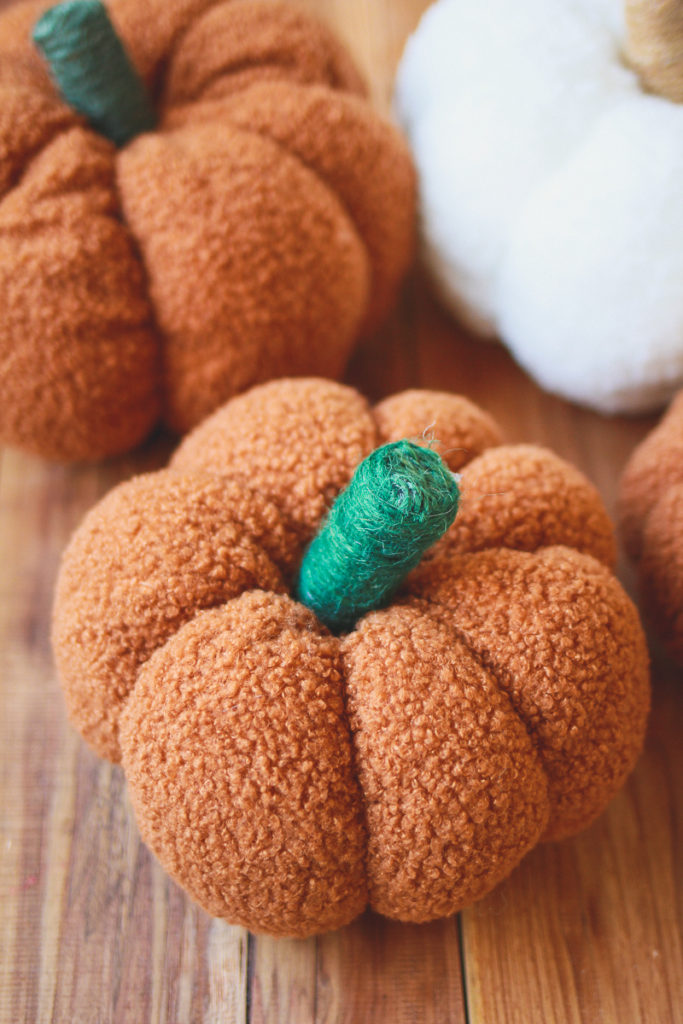
We made some white pumpkins and some orange pumpkins. For the stems, we used wine corks and wrapped them in either natural-colored twine (for the white pumpkins) or green twine (for the orange pumpkins). After we left my parents, my mom continued making pumpkins. She had a full pumpkin patch of pumpkin pillows and gave them out to neighbors and family. I think she can whip up a pillow in like 10 minutes!
Making the Pillows
My parents visited us last month for our birthdays. My mom brought me one pillow (pictured below for these step-by-step photos). My son is obsessed with these pumpkin pillows. He started picking them up and rearranging them in his kitchen, around the house, and all over his room. After dropping him off at school the other day, I went to his room to change his bed and tidy up. Pumpkins everywhere. At the grocery store over the weekend, my son got into a bucket of mini pumpkins and refused to leave the store without one. I can’t say I’m upset he’s into fall.
These are really easy to make if you give yourself the time to get the hang of it. Maybe by next Halloween I’ll get this jack-o-lantern pillow, but until then, I’ll have to enlist my mom for more pumpkins.
DIY Pumpkin Pillows
- Prep Time: 30 momnut
- Total Time: 30 minutes
- Yield: 1 pillow
- Category: DIY
Description
An easy pillow to create for Autumn.
Ingredients
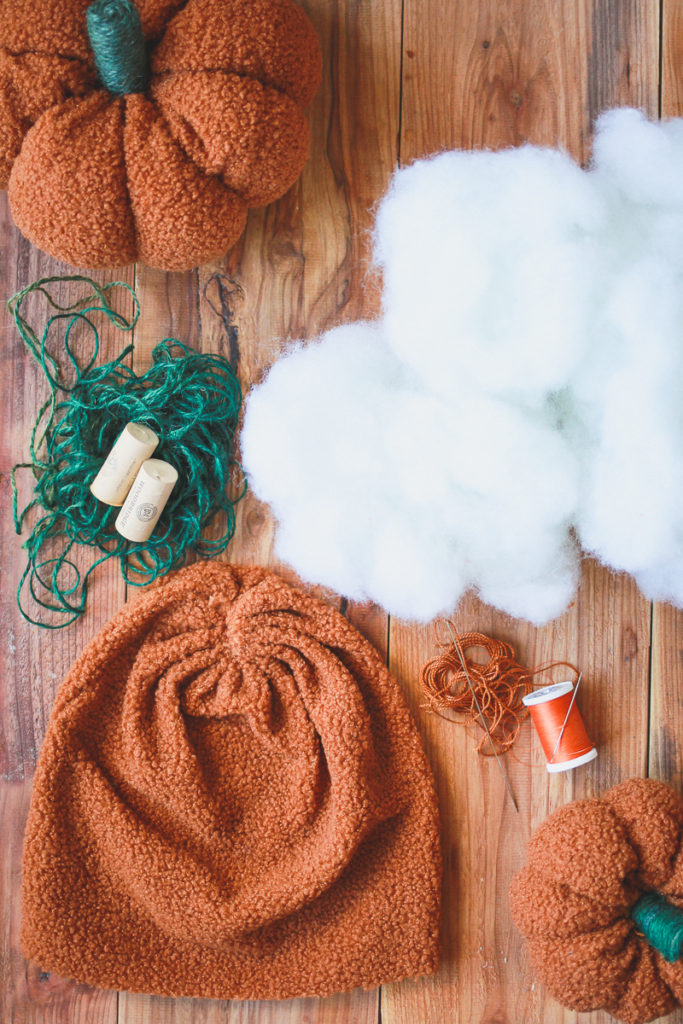
- ‘Teddy Bear’ fabric in the color of the pumpkin of your choice (Large cut: 12×24″, Medium cut: 10×20″, Small cut: 7×14″)
- Polyester fiber fill
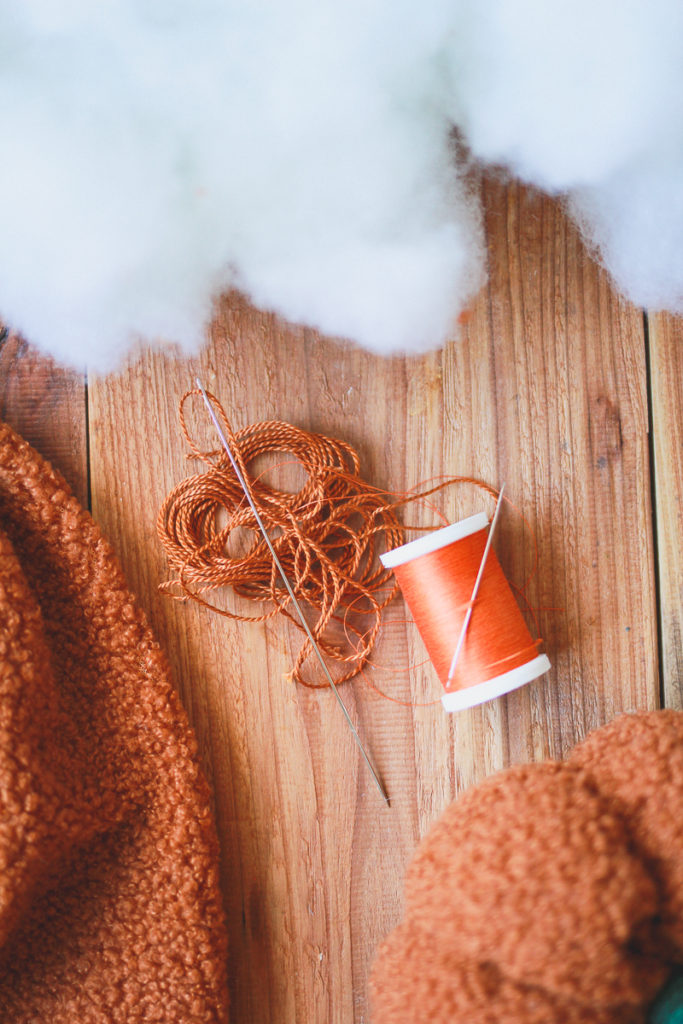
- Regular sewing needle
- Sewing thread (same color as the teddy bear fabric)
- Doll needle
- Craft cord (same color as the teddy bear fabric)
- Green and or natural twine
- Wine corks (1-2 per pumpkin)
- Hot glue gun
Instructions
The Stuffed Pumpkin
- With the teddy bear fabric on the inside fold the cut fabric in half.
- On the opposite end of the fold where the two ends of the fabric meet, sew that together so you get a loop. Use a sewing machine or do by hand.
- With one of the open sides (now referring to as the top and bottom), close the bottom with a straight stitch and pull it closed. You’ll want to run that stitch around the entire fabric (don’t put the fabric together and sew closed).
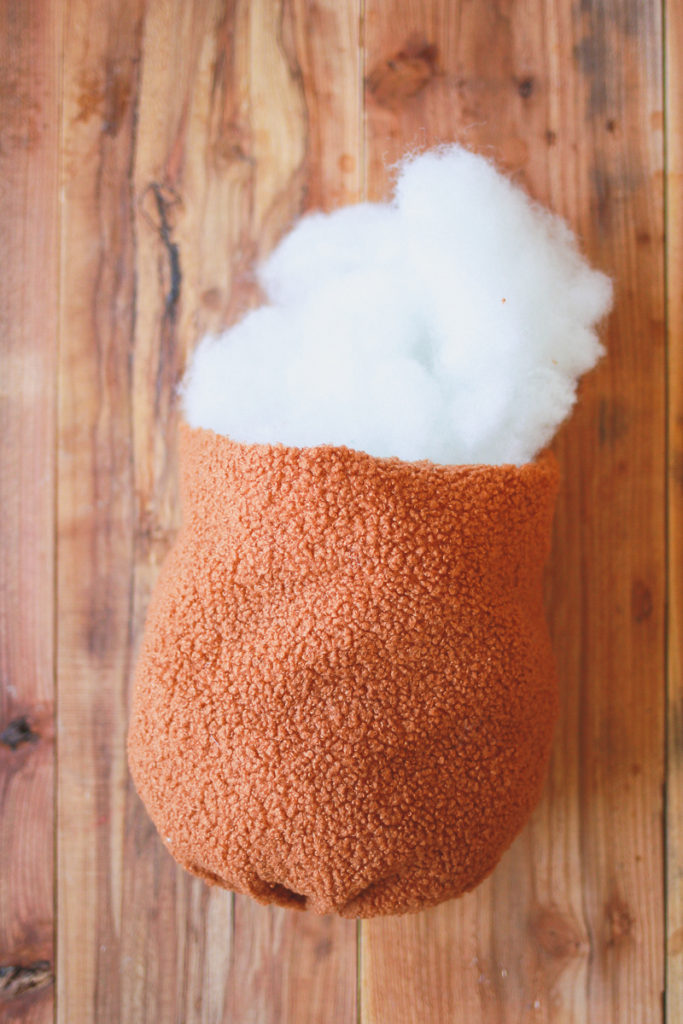
- Turn the fabric teddy bear side out and you should have what looks like a beanie or winter hat.
- This open part is the top.
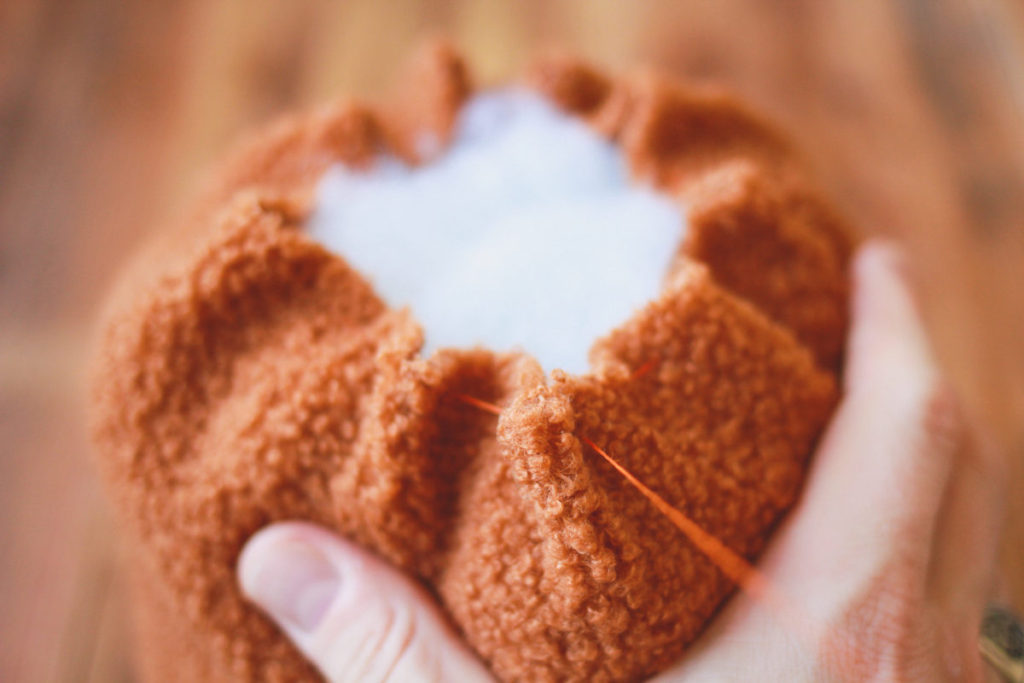
- Using the fiber fill, stuff the sac so it’s nearly full.
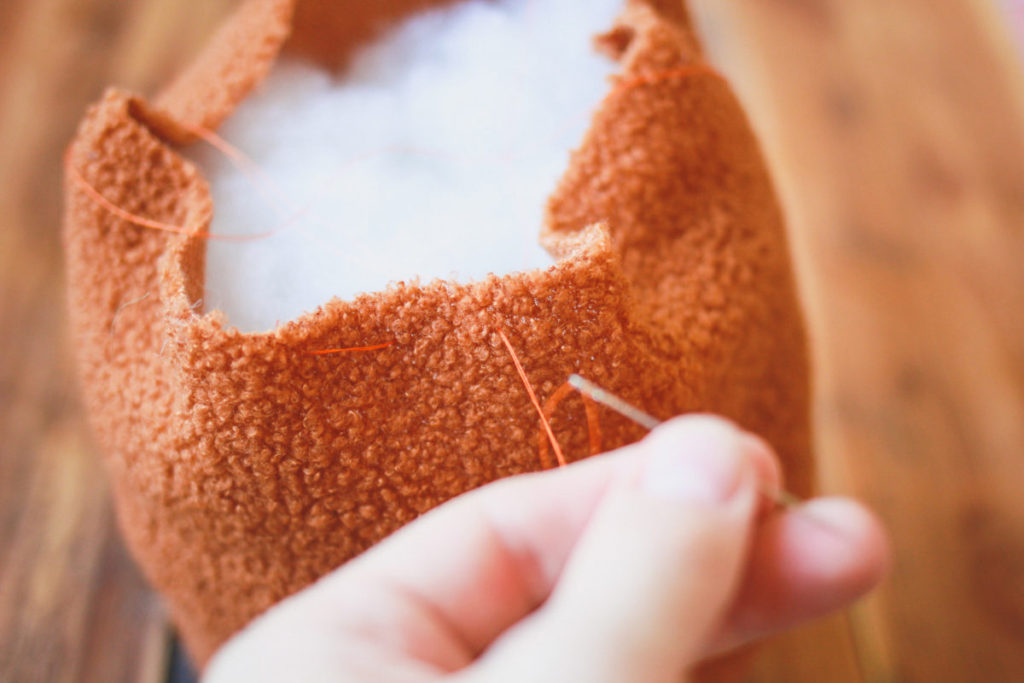
- With another straight stitch, thread the sewing thread around the opening, and pull closed.
- Now you have a ball.
- Switch to the doll needle and craft cord. Give yourself a lot of craft cord and double up.
- At the bottom of the ball where you made your first straight stitch close, anchor your craft cord.
- In the very center of the bottom, push your doll needle up and through the center of the top.
- Pull the cord all the way through until it’s taught with the anchor stitch.
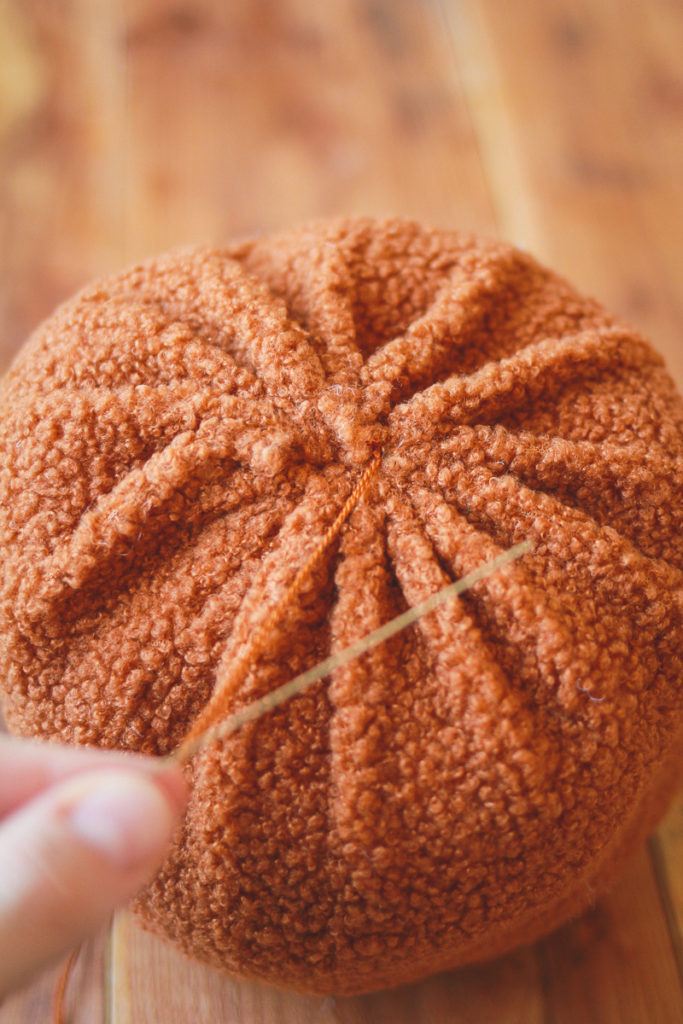
- Run the doll needle through the bottom again and up to the top. Pull the cord and you’ve made your first two ‘lumps’ of the pumpkin.
- Continue this process until you have about 8 lumps total. I like to evenly split the ball into quarters and then those quarters into eighths for a symmetrical look.
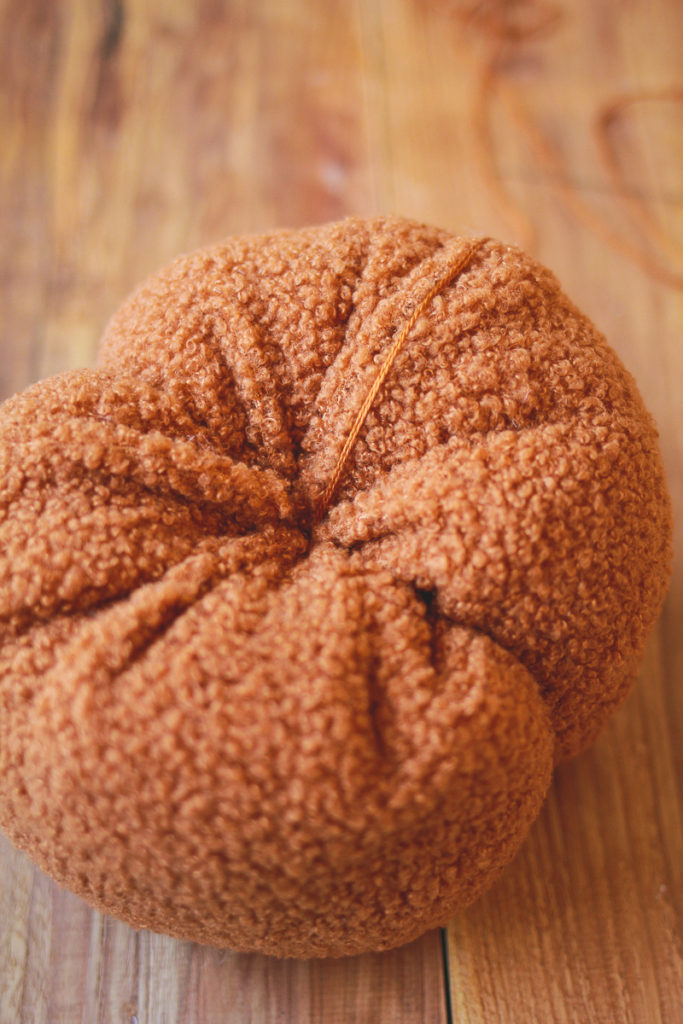
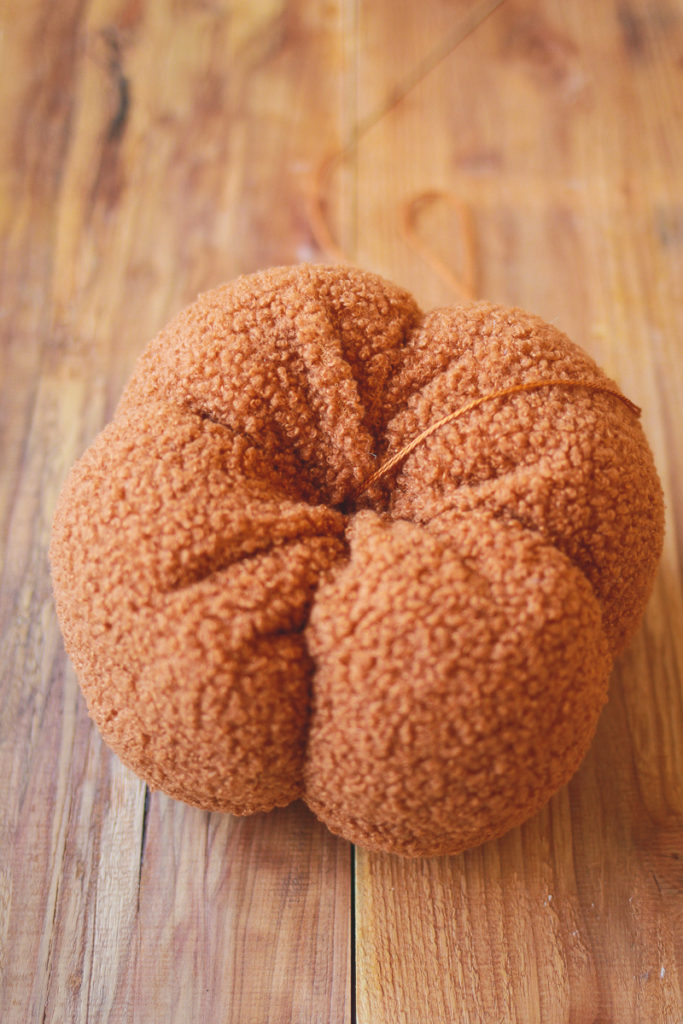
- When the last lump is created anchor the stitch.
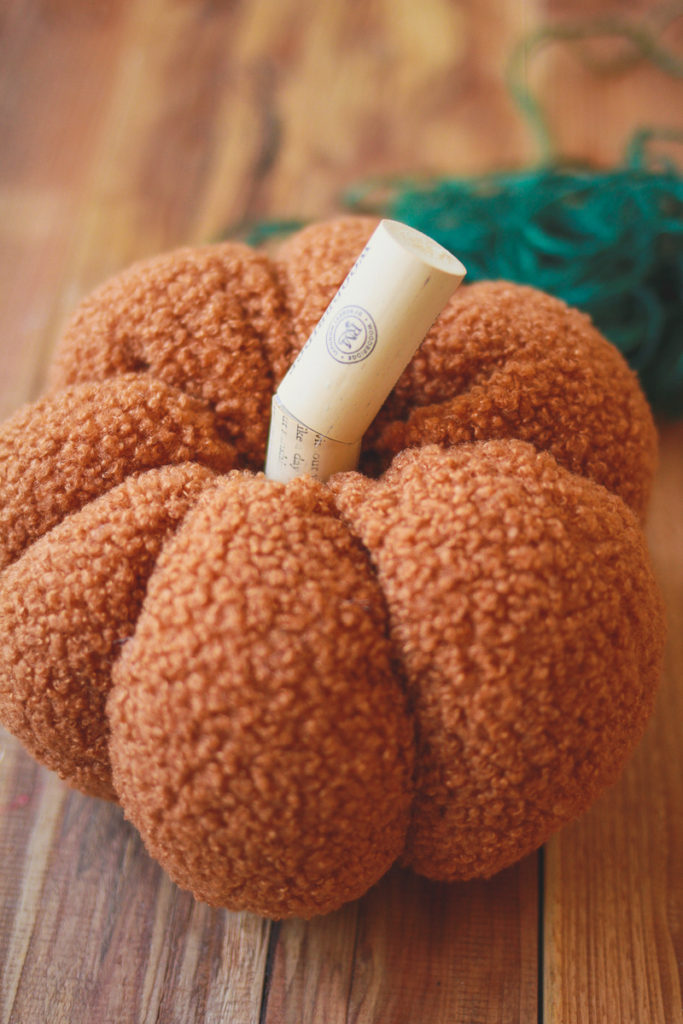
- Now you have a pumpkin with out a stem.
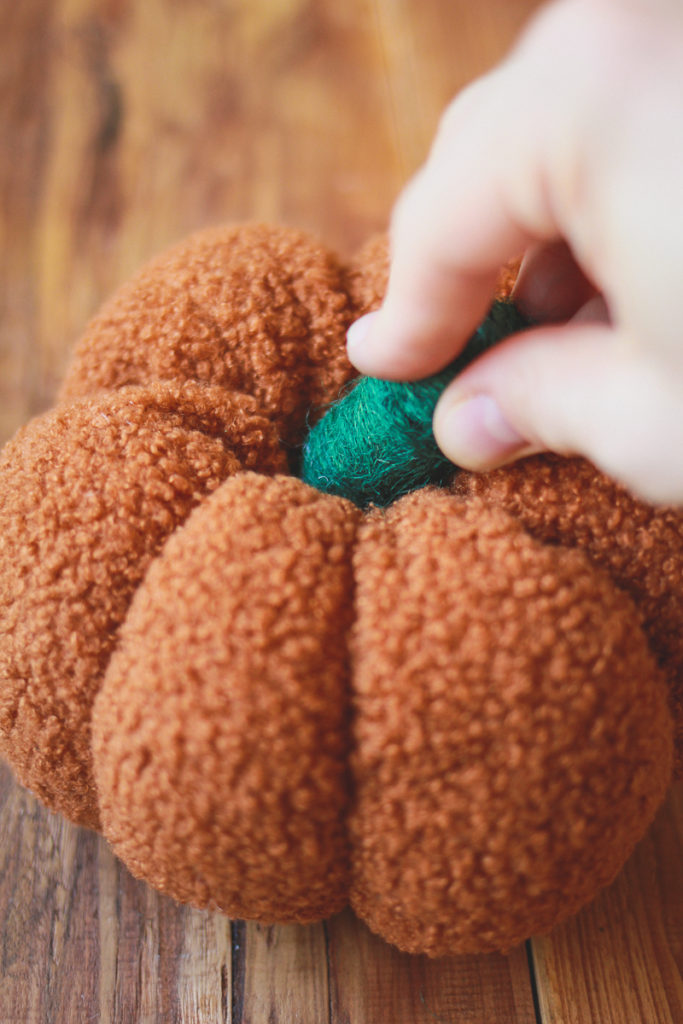
The Stem
- Depending on the size of your pumpkin, you may only need one wine cork. For the purpose of this post, my pictures are showing what you could do with two corks to create a lop-sided or larger stem.
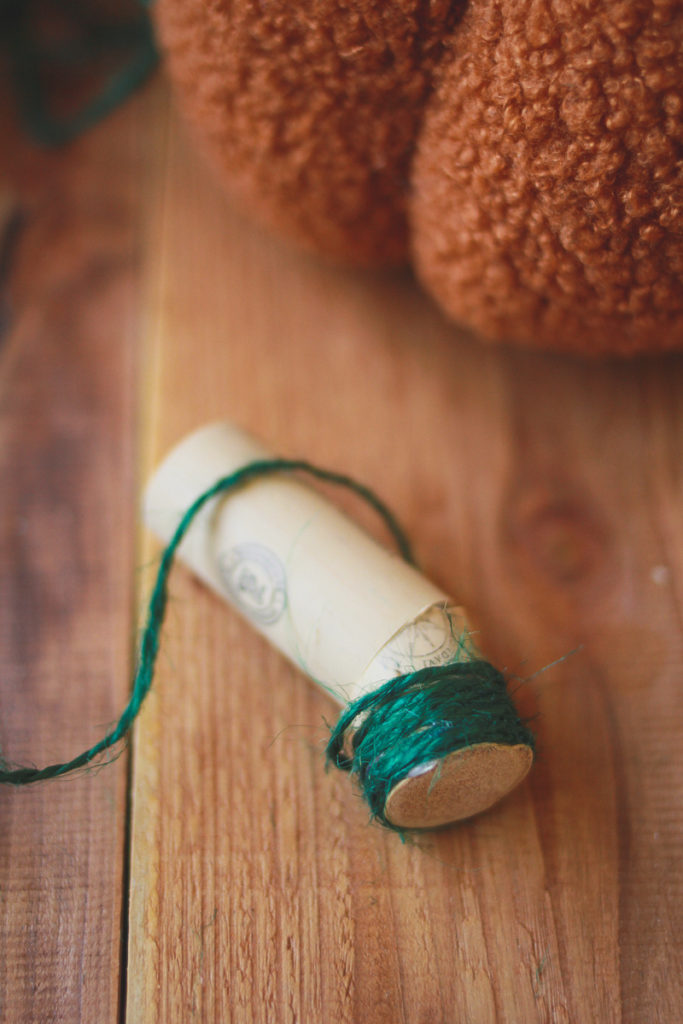
- Cut the cork and glue multiple corks together as needed.
- Spread some hot glue around the cork and loop your twine around the glue. You won’t need to glue every time your wrap your twine around, but use your judgement. After my first glue, I went about a quarter of the way up the cork, glued some more, and kept looping and gluing.
- Add glue to the bottom of the twine cork and stick into the top of the pumpkin.
- Congrats! You made a pumpkin pillow.