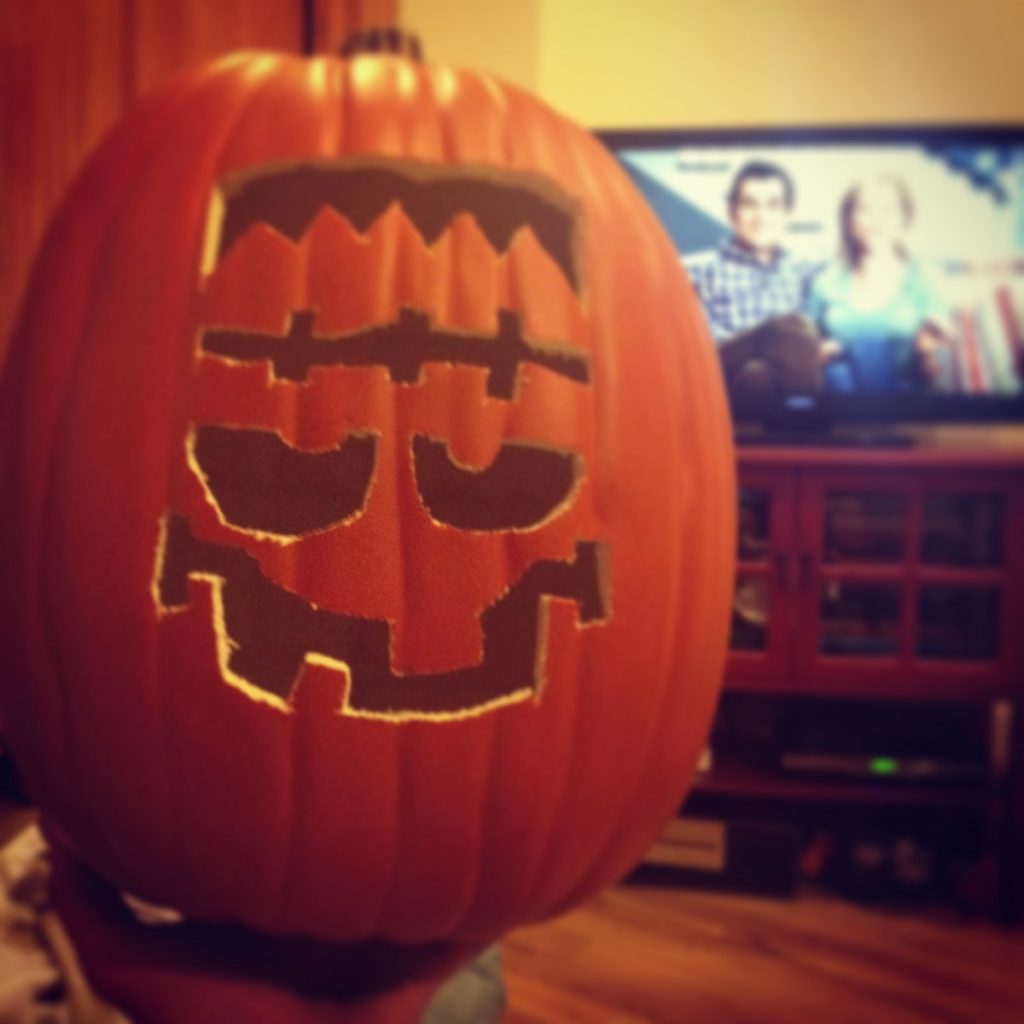
What’s better than the Frankenstein Pumpkin I carved?
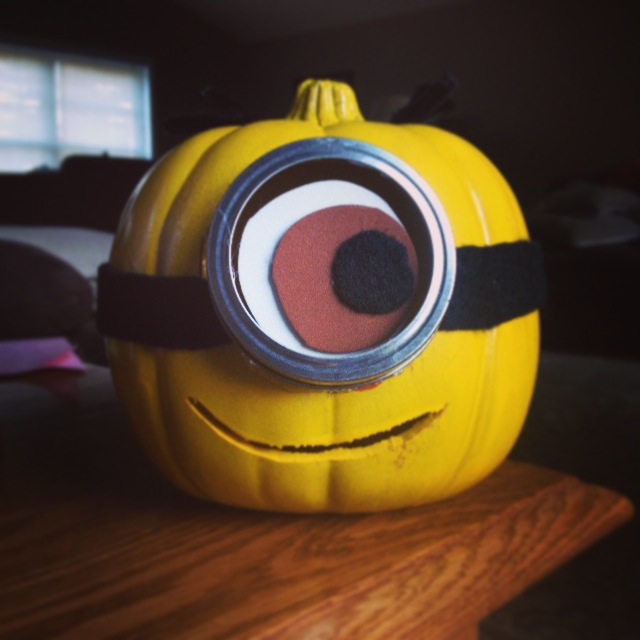
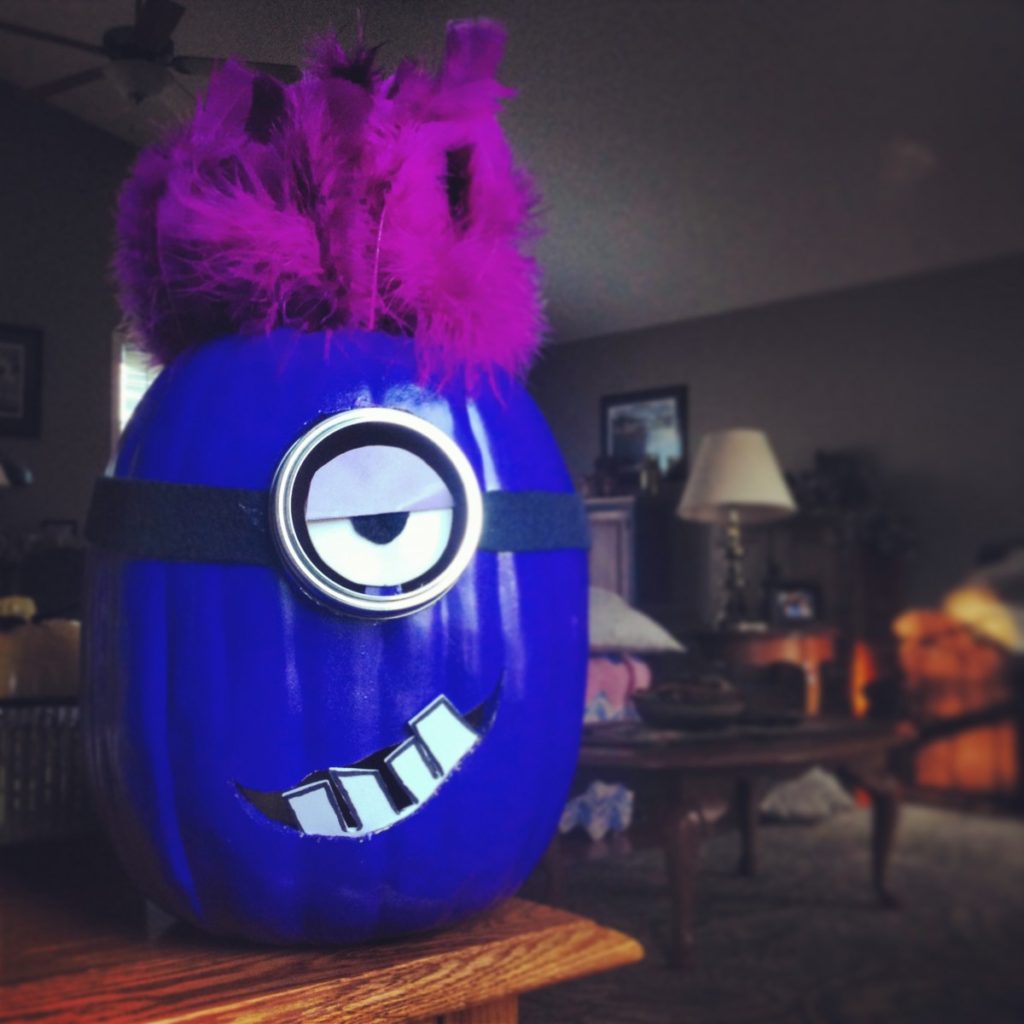
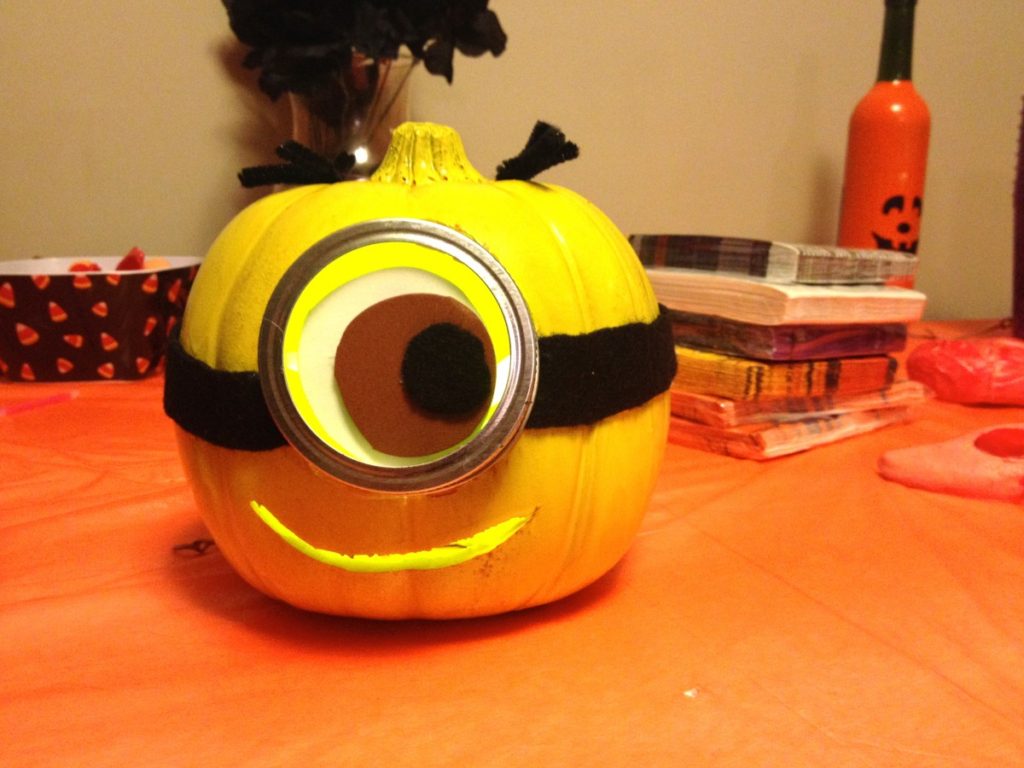
These Despicable Me themed Minion Pumpkins!

I got 1st place at my family’s Halloween party with these two cuties. I was inspired to make these minion pumpkins when I saw a post about hand-painted minion pumpkins at Coupon Clipinista. The goal was to carve these pumpkins, so with a little help from Target and Michaels, I was able to create these two.

Supplies:
- Fake pumpkin (find them at Target!)
- Yellow and Purple craft spray paint (Krylon)
- Sheets of White, Black, and Brown Felt
- Hot glue gun
- 2 canning jar lids
- Purple feathers
- Black pipe-cleaner
- Knife for carving
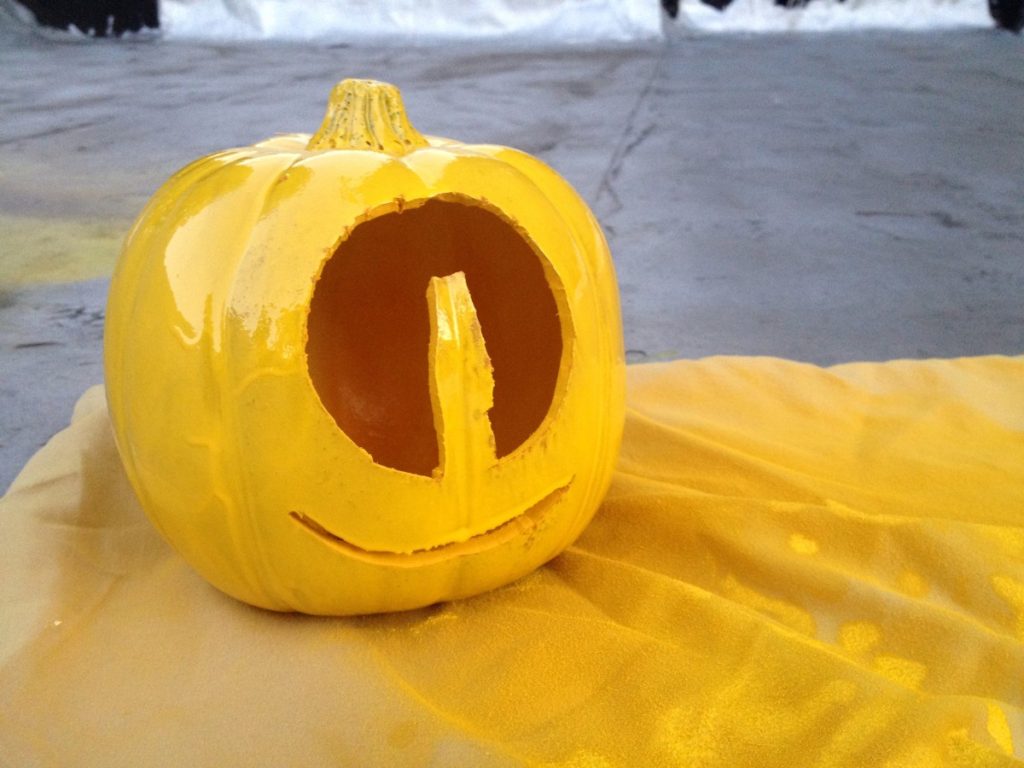
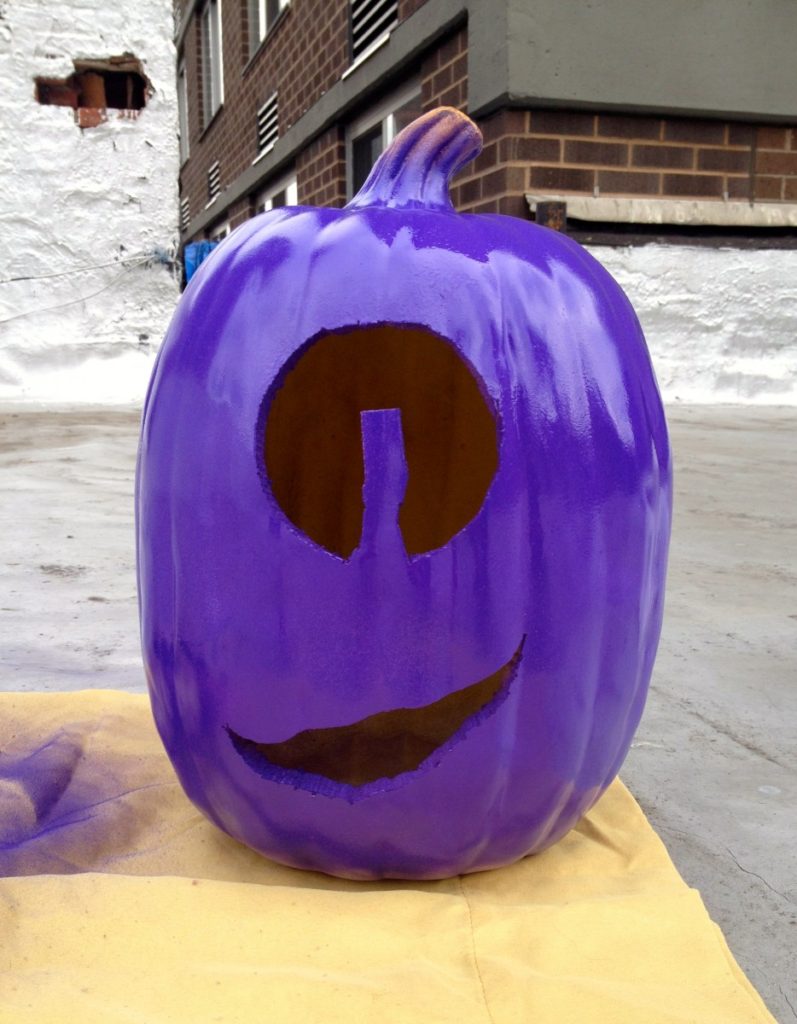
In my experience, the fake craft pumpkin I got from Target took the spray paint on the best. I bought a white one because it was going to be painted. The purple spray paint covered the pumpkin beautifully. The smaller pumpkin was from Michaels – it did not like to be painted. Target’s pumpkin was easier to cut as well. So if you can swing it, I recommend using Target’s fake pumpkins (not sponsored).

Instructions:
- Carve your pumpkins.
- I placed a canning jar lid seal on the pumpkin and traced a circle around.
- I followed the line all around except I left about a half inch at the bottom. Then I cut up into the middle of the circle created a pillar, and cut out the rest of the eye. – I did this for both pumpkins. I left the standing pillar so I could glue the eyes onto the pumpkin and still have an opening into the pumpkin.
- Carve a mouth. I did a free hand drawing for both. I knew I was putting teeth on the purple minion, so I made a larger mouth opening.
- Spray paint your pumpkins. I only needed two coats for the purple minion. The yellow is another story – it needed a lot. I spray painted the pumpkins standing up, waited for them to dry, and painted the bottom. I let them sit upside down, balancing on a cup to dry the bottoms.
- Eyes – I cut out white circles, smaller than the canning jar seals, and glued that on to the standing pillar. I cut out a smaller black pupil for the purple minion, and a brown and black circles for the yellow.
- I cut long strips of black felt and glued them form the openings of the eyes, around the pumpkin, and glued them to the other side of the eye opening.
- I hot glued the canning jar seals around the eye opening.
- To make the teeth, I cut out the teeth from the white foam felt, and shaped the bottom to the mouth. I cut a slit in the wall of the mouth so I could insert the teeth to look like they were coming out from the mouth, and glued them into place.
- I poked holes at the top of the purple minion and filled them in with feathers.
- I used yellow and purple glow sticks to light them up for the party.
- Voila! You’ve got yourself some cool minion pumpkins!