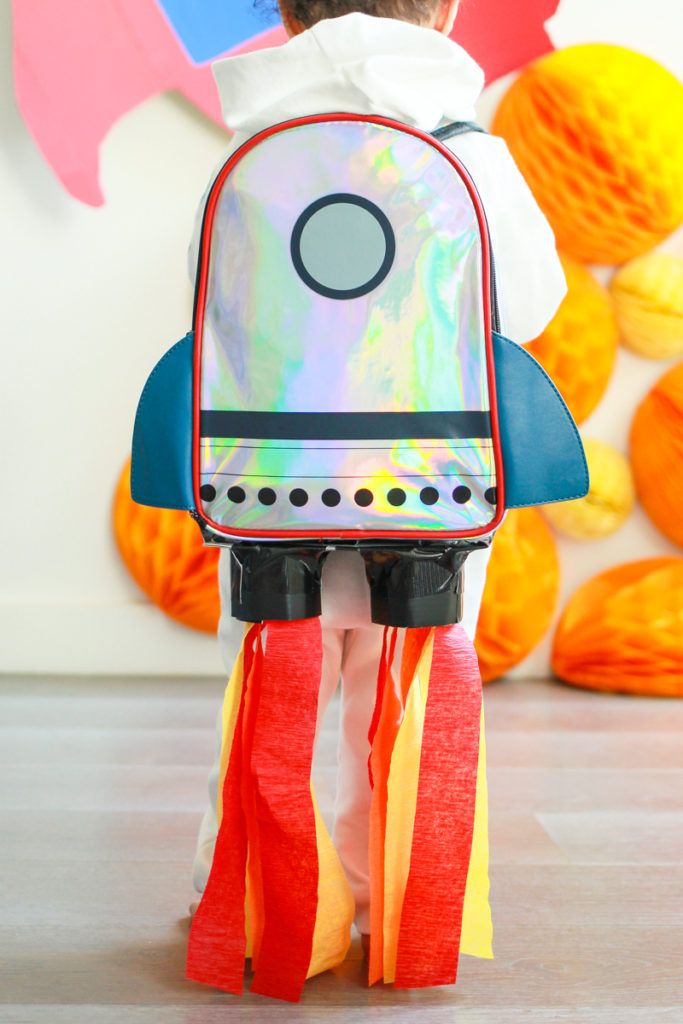
I have decided that for every birthday, my kids will have a themed photoshoot. They’ll make great memories to look back on and this way we get family portraits out of it! This year’s birthday theme was Two the Moon. For our son’s portraits, I crafted this DIY rocket backpack so he could land on the moon!
Because my wife and I are crazy planners, we ended with six of these backpacks at the end of January. While on a trip to Target, we stumbled upon these backpacks. These backpacks were on clearance and there were just enough of them left. We were going to turn them into gift bags for all the cousins. [Since we’re under isolation, we mailed them out]. I think we decided we were going to have a space theme right around Christmas when our son became fascinated with stars. Now, his favorite book is 8 Little Planets.
So yes, the takeaway here is we plan about six months in advance. Here’s a little secret, we have his Halloween costume already. Although self-isolation blew up our plans, we weren’t going to let it ruin our son’s birthday.
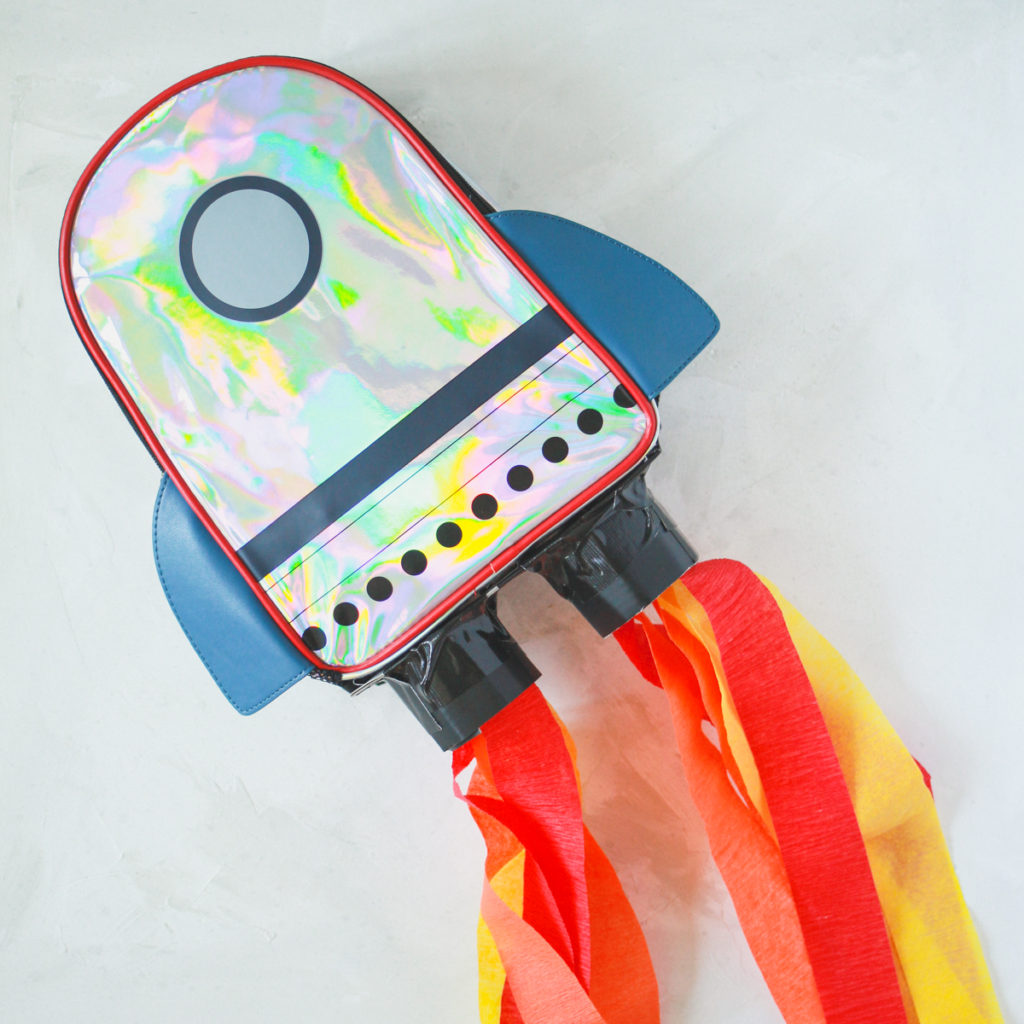
These DIY Rocket Backpacks Are So Easy To Make!
Lilies and Loafers has affiliate relationships, so we may get a small share of revenue from your purchases. Items are sold by the retailer, not by Lilies and Loafers.
I’m going to show you how to make the rocket engine and flames to affix to the bottom of the backpack. Hopefully you can get your hands on a rocket backpack!
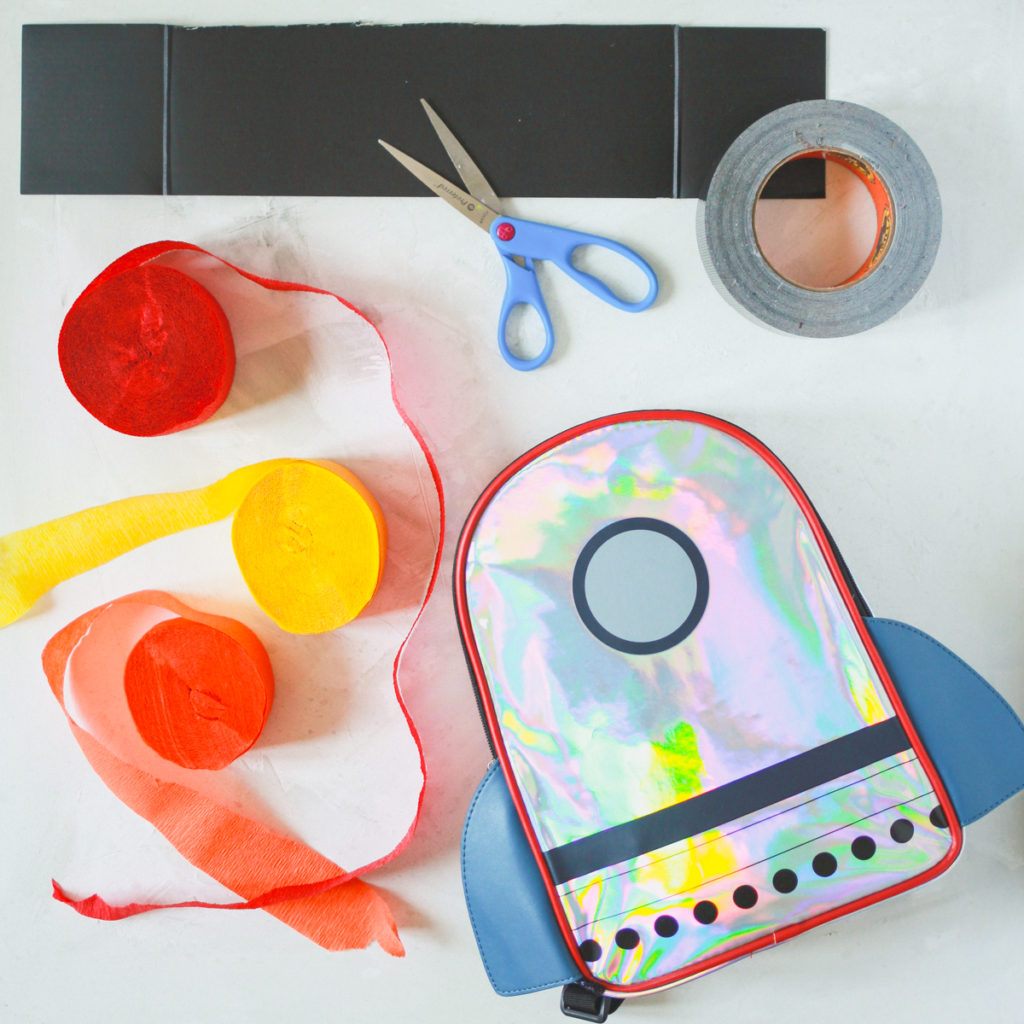
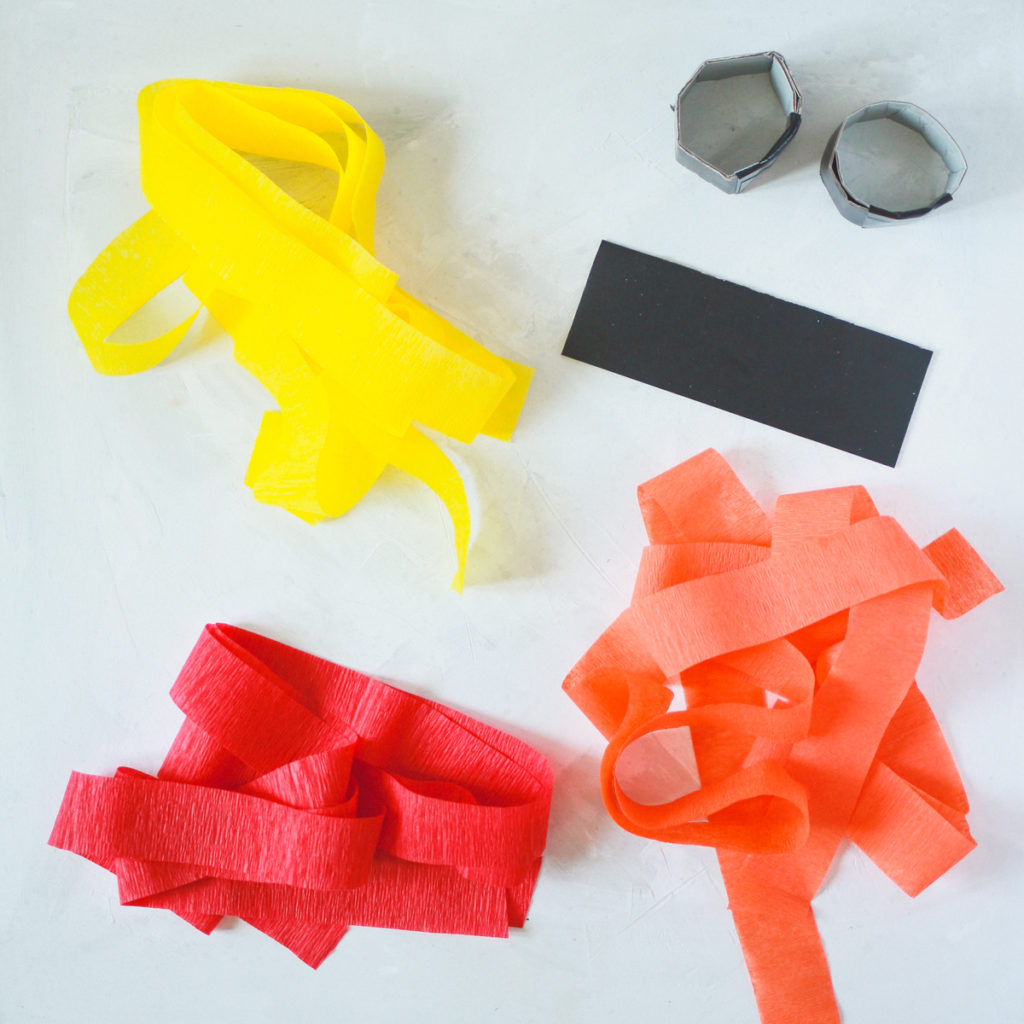
Supplies
- Rocket backpack
- Crepe paper streamers; yellow, orange, red
- Cardboard, preferably black
- Black tape
- Scissors
Directions
- Measure the bottom of the backpack and cut a piece of cardboard in the same size. This will be the base for the engines.
- Using remaining cardboard, cut thinner strips for the engines.
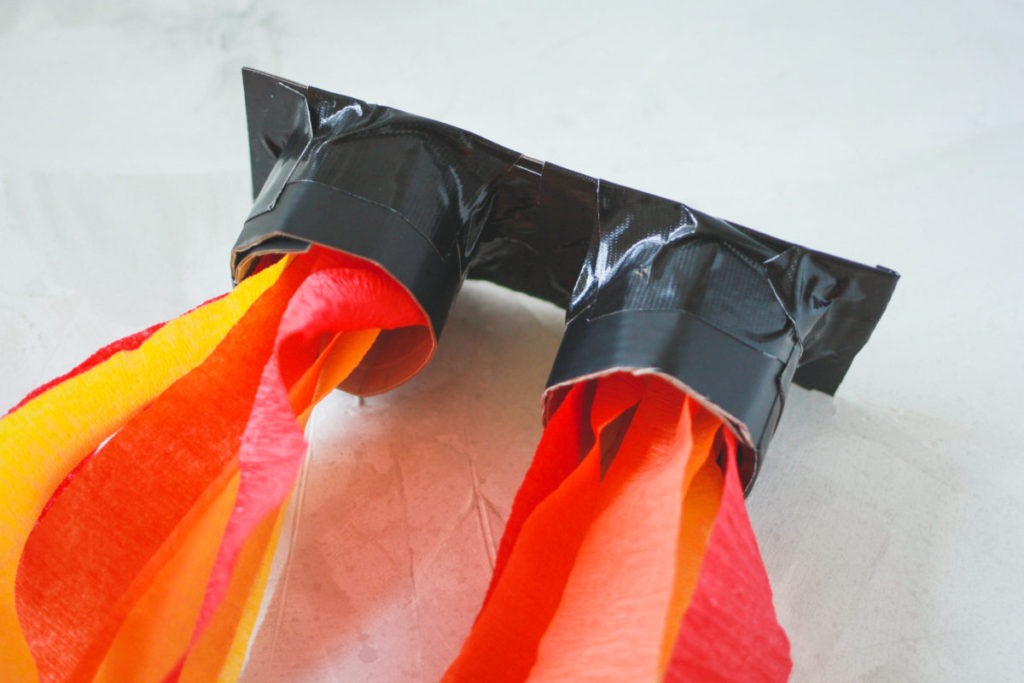
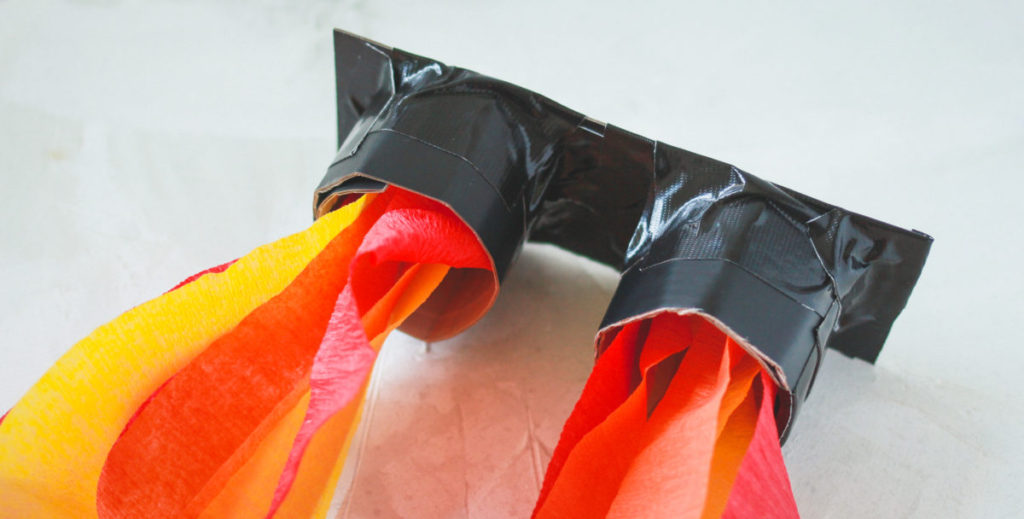
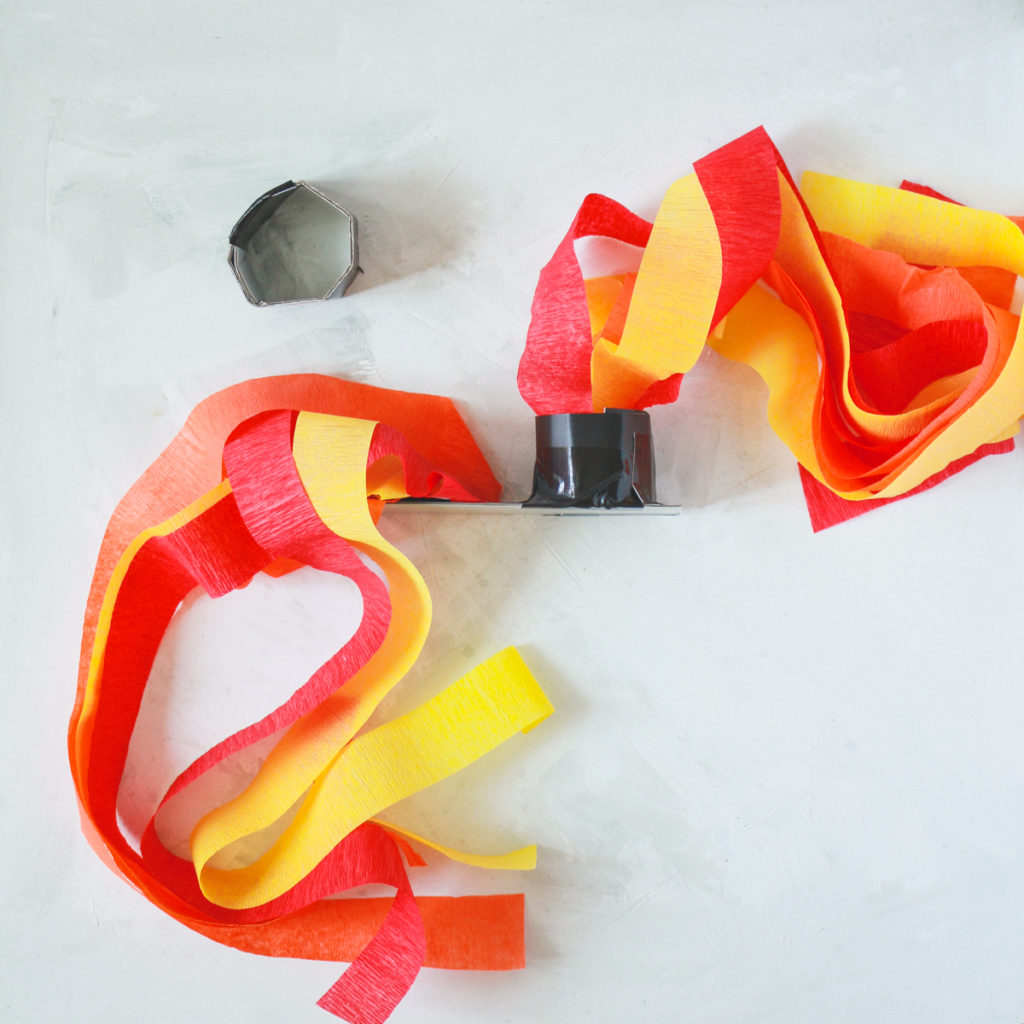
- Take one of the thin strips and curl it around into a loop. The diameter should be about the same size as the base cardboard. Tape the loop together. This is an engine. Repeat with the remaining thin strip.
- Place both looped cardboards on the base to space out where they will be installed. Mark the base in the middle of each loop. Place looped cardboard aside.
- Put the backpack on the person who will be wearing it. Measure from the base of the backpack to the floor and add 5 inches. Double this number. Measure out each color of the crepe paper streamers to that doubled number. Cut two strips from each color. For example: if it’s 10 inches from the base to the ground, add 5 inches to get 15 inches. Double this number to get 30 inches. Each strip of crepe paper streamers should be 30 inches. You’ll need two from each color. Make sense?
- Halve one of the strips and tape it to the cardboard base where you marked the middle of the loop. It should look like two pieces are hanging. Layer the remaining two colors over the first color. Repeat with the three remaining strips on the second marking.
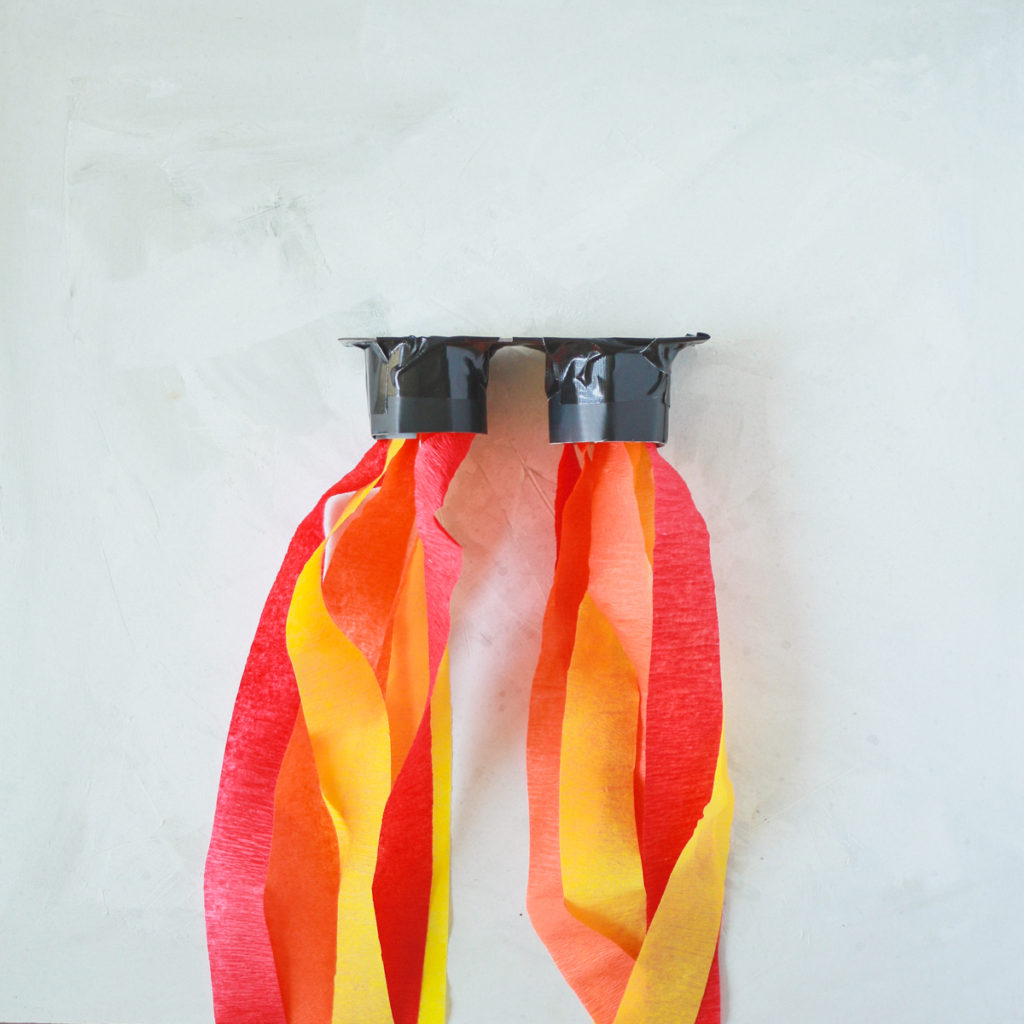
- Thread the strips through a looped engine all the way to the base. Tape it securely to the base. Repeat with the second engine.
- Install the base to the bottom of the backpack.
- Place the backpack on the person and cut off the extra length from crepe paper streamers. The streamers should be just touching or above the ground.